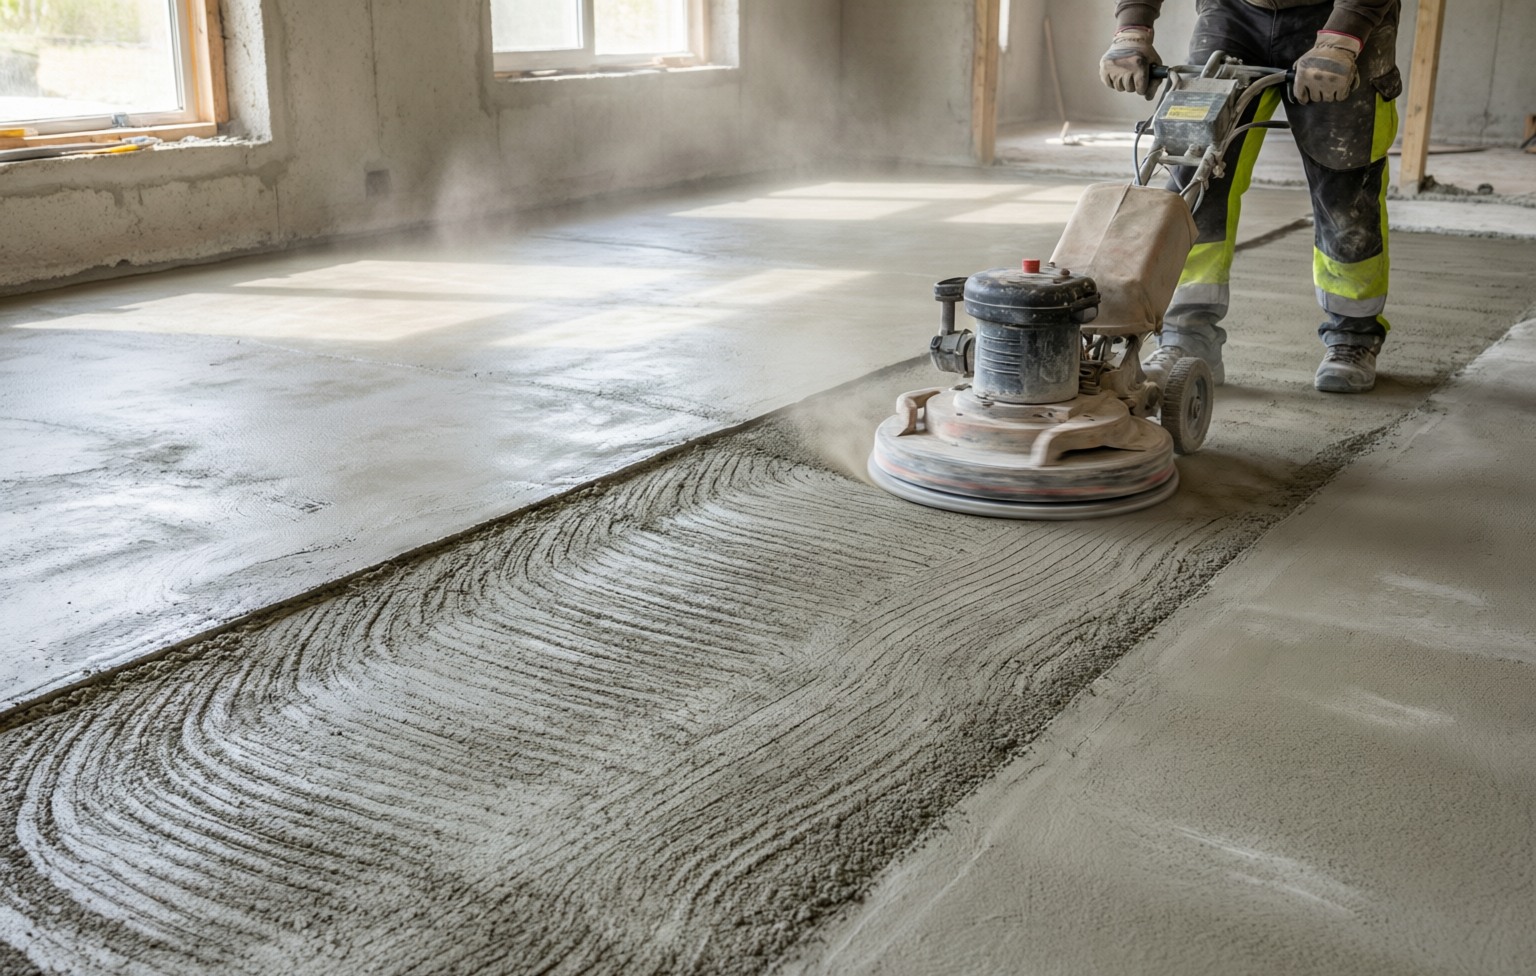
Diamond grinder opening the surface of a concrete slab before an epoxy floor is applied

Epoxy Floor Substrate Requirements — Four Gates, One Sequence

Almost nothing that goes wrong with these floors is caused by the resin. It is caused by what the resin was put on. The figures below are the entry conditions each of our own systems publishes, taken from the same sheets the product pages read — nothing here is typed in twice.

21Systems listed with their own gates
19Published entry-condition rows
127Preparation stages and their timings
16+Years manufacturing

The slab is decided before the colour is

A floor can be specified perfectly and still fail, because the specification was written against the coating rather than against the concrete under it. Four things have to hold at the same time. Each system quotes the ones it needs — and a system that publishes no figure for a gate is not claiming that gate does not matter, it is saying that row is not published, which is why this page shows the absence rather than filling it in from a neighbour.

Strength

Can the slab carry what the floor will be asked to carry?

Quoted as a grade or a pull-off figure on the systems that publish one. A coating does not add structural strength to a slab that has already failed; it debonds with the dust it was stuck to.

Fails as Riding, dusting or spalling under loaded wheels, usually within the first year of traffic rather than at handover.

Moisture

Is vapour still moving up through the slab?

The published figures are measured in the slab, not surface-dry by eye. Below grade, on grade without a damp-proof membrane, or over a leaking detail, the reading is the whole argument.

Fails as Blistering, loss of bond, and a floor that passes a visual check in week one and fails it in month three.

Age and cleanliness

Has the slab finished shrinking, and is anything still on it?

New concrete keeps moving while it dries, and the common killer is not dirt but a sealer, hardener or old adhesive the grinder was never told about.

Fails as Cracks tracking up through the film along a line nobody detailed, or a whole area lifting off on the membrane that was never removed.

Ambient and dew point

Can the room hold the conditions the sheet was measured in?

Temperature, relative humidity and the margin above dew point are published together because they interact: a cooled slab under a warm humid room crosses the dew point and blushes the finish mid-pour.

Fails as Blush, haze, pinholes and a cure schedule that quietly doubles — the visible cost is the delayed handover, not the material.

13 of the 21 systems publish at least one entry condition of their own, across 19 rows and 8 different row names for the same four ideas.

What each system asks of the slab, as published

These cards are generated from the same technical sheets the product pages read, at build time, and they are the row labels the sheets use. Notes are quoted whole — on this subject the note is usually the part that tells you whether the number applies to your building.

Colored Sand Floor Over Existing Tiles

This system publishes no substrate or environmental entry row of its own. Ask for the condition figures for your build rather than reading a neighbour's number across to it — the product page is still the authority.

Kitchen Colored Sand Floor Coating

This system publishes no substrate or environmental entry row of its own. Ask for the condition figures for your build rather than reading a neighbour's number across to it — the product page is still the authority.

Bathroom & Wet Room Colored Sand Floor Coating

This system publishes no substrate or environmental entry row of its own. Ask for the condition figures for your build rather than reading a neighbour's number across to it — the product page is still the authority.

Outdoor Colored Sand Floor Coating

This system publishes no substrate or environmental entry row of its own. Ask for the condition figures for your build rather than reading a neighbour's number across to it — the product page is still the authority.

Interior Decorative Colored Sand Floor Coating

This system publishes no substrate or environmental entry row of its own. Ask for the condition figures for your build rather than reading a neighbour's number across to it — the product page is still the authority.

Graded Broadcast Epoxy Floor for Car Park Decks

This system publishes no substrate or environmental entry row of its own. Ask for the condition figures for your build rather than reading a neighbour's number across to it — the product page is still the authority.

Cleanroom & GMP Antistatic Epoxy Floor System

Substrate strength
≥ 25 MPa compressive
An ESD floor over a weak slab is a demolition job waiting to happen
Substrate moisture
< 4 % CM, pH < 9
Ground-floor slabs without a working DPM are tested before we quote

Parking Deck & Ramp Anti-Slip Epoxy Floor

Substrate
≥ C25 concrete, ≥ 28 days
The deck structure has to be sound and correctly falls'd — a coating will not create either
Slab moisture
≤ 4 % CM
Decks above occupied space are tested; a leaking deck is a repair job first

Hospital & Clinic Seamless Epoxy Floor

Substrate
≥ C25 concrete, ≥ 28 days
Or a sound, dry cement screed; old tiles only after full removal of loose and foam-backed layers
Slab moisture
≤ 4 % CM
Basement and ground floors are tested before we quote

Warehouse & Forklift Traffic Epoxy Floor

Substrate strength
≥ C25 (≥ 30 MPa)
The slab carries the load; the resin carries the wear
Slab moisture
≤ 4 % CM
New slabs ≥ 28 days; ground-floor slabs without a DPM are tested first

Basement Epoxy Floor System

Slab moisture (gate)
≤ 4 % CM
ASTM F2659 / carbide method; below grade we test, we do not assume
New slab age
≥ 28 days
And no plastic sheeting left on the surface trapping moisture

Heavy-Duty Anti-Slip Garage Epoxy Colored Sand

Substrate
≥ C25 concrete, ≥ 28 days
And no cure-and-seal, hardener or old coating left on it — that is the usual reason a garage floor lifts
Moisture
≤ 4 % CM · MVER ≤ 4 lb / RH ≤ 75 %
ASTM F1869 / F2170. An on-grade garage slab without a DPM is the normal case here, so measure it — an open door makes a wet slab look dry

Anti-Static Self-Leveling Epoxy

Working conditions
10–30 °C, RH ≤ 75 %
Sound concrete ≥ C25, substrate moisture ≤ 4 % (CM test), ambient 10–35 °C and relative humidity ≤ 80 %, surface at least 3 °C above dew point.

Epoxy Self-Leveling Flooring

This system publishes no substrate or environmental entry row of its own. Ask for the condition figures for your build rather than reading a neighbour's number across to it — the product page is still the authority.

Flake Epoxy Colored Sand Flooring

Working conditions
10–35 °C, RH ≤ 80 %
Sound concrete ≥ C25, substrate moisture ≤ 4 % (CM test), ambient 10–35 °C and relative humidity ≤ 80 %, surface at least 3 °C above dew point.

Flexible UV-Resistant Self-Leveling Epoxy

This system publishes no substrate or environmental entry row of its own. Ask for the condition figures for your build rather than reading a neighbour's number across to it — the product page is still the authority.

Metallic Epoxy Colored Sand Flooring

Working conditions
10–35 °C, RH ≤ 80 %
Sound concrete ≥ C25, substrate moisture ≤ 4 % (CM test), ambient 10–35 °C and relative humidity ≤ 80 %, surface at least 3 °C above dew point.

Solid Color Epoxy Colored Sand Flooring

Working conditions
10–35 °C, RH ≤ 80 %
Sound concrete ≥ C25, substrate moisture ≤ 4 % (CM test), ambient 10–35 °C and relative humidity ≤ 80 %, surface at least 3 °C above dew point.

Figures are typical values measured in our laboratory. Substrate, climate and workmanship affect the result — we confirm the final specification in writing before your order. 8 of the 21 cards above carry no published entry row and say so instead of borrowing one.

The sequence, with the timings our own sheets publish

Preparation is not one line in a quotation; it is a run of stages that each gate the next one. Below, every stage each system publishes, in the order the sheet gives it, with its stated timing — the negative-margin survey day, the grinding, the joint detailing, the primer window, the release date.

Read this before comparing cards.21 systems share 19 published programmes: where two or more systems in the same family are built the same way, we publish one schedule rather than invent a per-system variant. 108 of the 127 stages below are therefore repeated across cards. Where your build needs a different sequence, it changes at quotation stage, not after the first coat is down.

Colored Sand Floor Over Existing Tiles

  1. Prove the bed before quotingBefore orderA full-floor tap test, including the areas behind and under units that get inspected exactly once, plus a note of every crack line. Where tiles are hollow, where the bed has debonded, or where an old leak has softened the make-up, the floor is lifted. A thin decorative film records the failure and holds the moisture in.
  2. Open the glazeDay 1Scarify or diamond-abrade the tile surface to a mechanical key and vacuum to a clean film. Gloss tile that has had a wax or polish applied needs that stripped first, and that is a different operation.
  3. Fill the grid and skimDay 1Fill every grout line and skim the floor so the grid has nothing to print through from. This step decides the appearance more than the coloured sand does, and skipping it is the single most common cause of a complaint twelve months later.
  4. Set the primer for what is underneathDay 1Porosity, residual damp and the original bedding mortar decide the primer and its rate. Old tiled floors are frequently over a make-up that has been wet under an appliance for years, so this is specified from site information.
  5. Work the coloured sand coatDay 2One pack at a time, gauged to roughly 1.5 kg/m² over the abraded tile, worked across and back-rolled so the aggregate reads even. Batch the room in one operation so a colour change is not visible inside it.
  6. Wear coat, then keep the room off itDay 3 onwardApplied once the sand coat has set. No furniture back down, no rugs laid and no mop until the release timing for the specific primer and wear coat in your quote has been confirmed in writing.

Kitchen Colored Sand Floor Coating

  1. Settle the cleaning question firstBefore orderAsk what the floor is actually washed with. If the answer is a degreaser or a steam mop, this build is the wrong answer and there are better ones. That conversation costs nothing before the order and everything after it.
  2. Test what is under the unitsDay 1Existing kitchen tile has to be bonded, flat and hollow-free across the whole floor, including the areas behind and under the units that get inspected only once. Loose or debonded bed is lifted, not coated.
  3. Abrade, repair, vacuumDay 1Scarify the glaze or diamond-grind the slab, fill cracks, level. A gloss film shows every ridge in the preparation and every tile joint beneath it, so this step decides the appearance.
  4. Set the primer for the slabDay 1Porosity and residual damp decide the primer and its rate, specified from the site information. The wrong choice here fails the whole build, and kitchens are often on a slab that has been wet under a dishwasher for years.
  5. Work the coloured sand coatDay 2One 20 kg pack at a time, gauged to roughly 1.4 kg/m², back-rolled to open the aggregate evenly and then flooded so the kitchen gets a closed surface. Batch the room so a colour change is not visible in it.
  6. Wear coat, then keep the room off itDay 3 onwardApplied once the sand coat has set. No appliances rolled back, no mats laid and no mop until the release timing for the specific primer and wear coat in your quote has been confirmed in writing.

Bathroom & Wet Room Colored Sand Floor Coating

  1. Settle the water question firstBefore orderConfirm the fall to the drain, the condition of the drain detail, and whether there is a membrane under the existing tile bed. Where a bathroom has no fall and the slab below is somebody else's ceiling, that is the job and the coating is the finish over it.
  2. Test what is already thereDay 1Existing tile has to be bonded, flat and hollow-free, and abradable to a mechanical key. Tap-test the whole floor. Loose or debonded tile is lifted, because a decorative film laid over a failed bed records the failure and holds the water in.
  3. Abrade, repair, vacuumDay 1Scarify the glaze or diamond-grind the slab, fill cracks and level. A gloss film shows every ridge left in the preparation and every tile joint under it, so this is the step that decides the appearance.
  4. Set the primer for the roomDay 1Porosity and residual damp decide the primer and its rate. We specify it from the site information rather than from a fixed number, because the wrong choice here fails the whole build.
  5. Work the coloured sand coat and cove the wall lineDay 2One 20 kg pack at a time, gauged to roughly 1.4 kg/m², back-rolled to open the aggregate evenly. Taken up the wall as a coved junction rather than stopped at a perimeter line. Batch the room so a colour change is not visible in it.
  6. Gloss wear coat, then keep water off itDay 3 onwardApplied once the sand coat has set. No shower, no mop and no standing water until the timing for the specific primer and wear coat in your quote has been confirmed — we set that per project rather than reading it off a sheet.

Outdoor Colored Sand Floor Coating

  1. Settle the water question firstBefore orderConfirm the slab falls away from the building and reaches a channel or an edge. Where it ponds, fix the falls or accept a different detail — a coating does not create a gradient, and standing water will find the edge of the film.
  2. Take off what the weather leftDay 1Curing membranes, old sealers, efflorescence, moss and the green film that grows on a shaded deck all have to come off by abrasion. Bonding to any of them is the most common way an outdoor floor fails at the interface rather than in the film.
  3. Choose the working window, not just the dayDay 1–2Outdoor application needs a dry surface, a rising or stable slab temperature, and a forecast with no rain through the cure. Dew point matters more than people expect: a deck that drops below it overnight while the coat is still open comes up blotchy.
  4. Prime for the slabDay 2External slabs are usually wetter and more contaminated than internal ones. We set the primer and its rate from the site information, because the wrong choice here fails the whole build.
  5. Work the coloured sand coatDay 3One 20 kg pack at a time, gauged to roughly 1.4 kg/m², back-rolled to open the aggregate evenly. Batch the whole area so a colour change is not visible across it.
  6. Wear coat, then protect it while it curesDay 4 onwardThe weatherable clear goes on once the sand coat has set. Keep rain, dew and foot traffic off it until it is through — an external floor has no building around it to shelter the cure.

Interior Decorative Colored Sand Floor Coating

  1. Confirm the substrate decisionBefore orderSound concrete, or existing tile that is hollow-free and can be abraded to a mechanical key. A debonded tile floor is demolished, not coated — a decorative topcoat will telegraph the failure within a season.
  2. Abrade, repair, vacuumDay 1Diamond-grind concrete or scarify/abrade the tile glaze. Fill cracks and level the floor. A gloss film shows every ridge left in the preparation, so this is the step that decides the appearance.
  3. Set the primer for the slabDay 1Porosity decides the primer and its rate. We specify it from the site information rather than from a fixed number, because the wrong primer here fails the whole build.
  4. Mix and work the coloured sand coatDay 2One 20 kg pack at a time, gauged to roughly 1.4 kg/m², back-rolled to open the aggregate evenly. Batch the room so a colour change is not visible mid-floor.
  5. Gloss topcoatDay 3Applied once the sand coat has set. This is the layer that carries the depth, so dust control matters more here than on a satin build.
  6. Release to useDay 3 onwardTouch dry in about eight hours on the partner data sheet. Everything after that is confirmed per project, because we have not measured walk-on or cure for this build.

Graded Broadcast Epoxy Floor for Car Park Decks

  1. Grind and vacuumDay 1CSP 1–2 profile, no laitance left; dust is the main cause of delamination.
  2. Prime2–4 hRoll epoxy primer and let it go tack-free.
  3. Broadcast the pigmented sand45 min/100 m²Spread colored sand into the wet resin and lock it with a second roll of binder.
  4. Roll off and flattenSame passRemove loose grain and level the texture so the colour field reads uniform.
  5. Seal coat6–12 h laterApply the chosen gloss seal coat; keep the wet edge to avoid lap marks.
  6. Cure and releaseNext dayBarrier off; foot traffic after 8 hours, furniture after 24 hours.

Laboratory Chemical-Resistant Epoxy Floor System

  1. Get the actual exposure listWeek −2Which reagents, which concentrations, how often they spill and how long they sit before someone wipes them. A teaching lab and an organic synthesis lab get different specifications — and sometimes a different product.
  2. Test the slabDay −3Moisture ≤ 4 % CM and a 24-hour taped polyethylene check near the sink and the external wall. Below-grade or poorly drained labs are where these floors fail.
  3. Strip and grindDay 1, 3–5 h per 100 m²Old vinyl, adhesive and any failed coating come out completely; then diamond-grind to CSP 2–4 and vacuum to a dust-free surface.
  4. Prime, then form the coveDay 1–2, then 12–16 hPrimer worked into the profile, then the mortar fillet at the wall base and around bench feet. The cove is built before the body so it is one continuous surface.
  5. Pour the bodyDay 2–3, 2–3 h per bay2–3 mm self-levelling gauge-spread and spiked. One bay or one bench run per shift — no cold joint across a doorway.
  6. Topcoat and release by zoneDay 4, then 7 dWear coat with fine aggregate in the wet zones. Walk-on at 24 h, trolleys and heavy use at 72 h, and the full cleaning regime only after 7 days.

Cleanroom & GMP Antistatic Epoxy Floor System

  1. Agree the electrical and validation requirement firstWeek −3Which grade, which rooms, where the earth point is, and who signs off the resistance record. This decides the build-up before any colour does.
  2. Confirm the slabDay −2Compressive, moisture and pH readings plus a 2 m straightedge check. Fix the slab now — a resin overlay will not rescue it later.
  3. Grind and extractDay 1, 4–6 h per 200 m²Diamond-grind to open the profile, remove every trace of sealer and old adhesive, and keep dust captured — cleanroom work is dusty until it is not.
  4. Lay the copper grid and tie it to earthDay 1–2Tape laid in the grid pattern, tied to the documented earth point, then continuity-checked and photographed before anything covers it. Once it is under resin you cannot inspect it.
  5. Conductive primer and intermediateDay 2, then 12–16 hWorked into the grid so the charge has a continuous path from the surface down to earth. Gaps here are the usual cause of a failed reading.
  6. Form the cove, then pour the bodyDay 3, 2–4 h per bayCoved upstand at the wall base first, then 2–3 mm antistatic self-levelling gauge-spread and spiked. One bay per shift, no cold joint across a doorway.
  7. Wear coat, measure, hand overDay 4, then 7 dLow-sheen ESD wear coat, then surface resistance measured across the floor and recorded with area and ambient conditions. That record is what goes in the validation file.

Epoxy Floor Over Existing Tiles

  1. Tap-test every tile and check the building ageDay −7A hollow tile under a resin overlay stays hollow and will show. And if the tile bed or adhesive predates about 1980, asbestos is a live question — get a survey before anything is abraded.
  2. Degrease and abrade the glazeDay 1, 3–5 h per 30 m²Diamond grind or scarify to a uniform matte surface across tiles and grout. No acid etching, no sanding dust left in the joints.
  3. Remove loose tiles and make goodDay 1Lift debonded tiles and fill the voids flush; leave a level bed for the skim.
  4. Prime into the profileDay 1, then 12–16 h0.3–0.4 kg/m² high-solids epoxy, worked into the grout lines as well as the tile faces.
  5. Fill the grid and skimDay 2, then overnightThixotropic epoxy pressed into the grout lines, then a buffer/skim coat over the whole area. This is the step that stops the tile pattern reappearing in six months.
  6. Level, topcoat, and detail the thresholdsDay 3, then 7 d2–3 mm self-levelling body, then the wear coat. Fit transition profiles at doors and undercut leaves where the new level binds them.

Parking Deck & Ramp Anti-Slip Epoxy Floor

  1. Survey the deck, not just the areaWeek −2Gradient, falls, joint layout, drainage inlet positions, whether the deck is exposed or covered, and what is underneath it. A ramp over a shop ceiling is a different conversation from a ramp onto a ground slab.
  2. Water-test the fallsBefore quotingFlood or hose the deck and watch where it stands. Water that ponds will be ponding on the finished floor too, and no coating fixes a bad fall.
  3. Shot-blast and make goodDay 1–2Remove laitance, sealers and curing membrane; rebuild spalled joint edges and kerb lines where tyres scrape.
  4. Detail the joints firstDay 2Movement joints sawn clean and filled with a flexible detail; sawn and construction joints carried through the resin line. Doing this after the body coat is why joints fail on ramps.
  5. Prime and full-broadcastDay 3, then 12–16 hPrimer at 0.3–0.5 kg/m², binder gauge-spread, then coarse aggregate broadcast to refusal and left until the resin cures under it. Excess is swept back.
  6. Seal, mark, and open by zoneDay 4, then 7 dTopcoat with a light aggregate refresher, lane and edge lines formed in the same coat. Zones are released as they cure; vehicles at 48–72 h, full service at 7 days.

Hospital & Clinic Seamless Epoxy Floor

  1. Survey, and agree the phasingWeek −2Room by room: which bays can be closed, the overnight window, the protection route, and where the waste and services run. In a live facility the sequence is the specification.
  2. Strip and grindDay 1, 4–6 h per 200 m²Old vinyl, adhesive and foam-backed residue come up completely — resin bonded to adhesive will fail. Then diamond-grind to CSP 2–4 and vacuum.
  3. Repair and track the jointsDay 1–2Cracks routed and filled; slab joints carried through the resin as filled joints, not bridged.
  4. Form the cove filletDay 2, then overnightEpoxy mortar pressed into the wall base at a 50–75 mm radius, done before the body so the upstand is continuous with the floor and not applied on top of it.
  5. Prime and pourDay 3, 2–3 h per bayPrimer at 0.25–0.4 kg/m² across fillet and slab, then 2–3 mm self-levelling gauge-spread and spiked. One bay per shift, no cold joints across a doorway.
  6. Topcoat and release in stagesDay 4, then 7 dLow-satin wear coat, then closed and signed off room by room. Beds and trolleys from 48–72 h, full disinfectant regime from day 7.

Warehouse & Forklift Traffic Epoxy Floor

  1. Survey the slab and the trafficDay −7Truck type, tyre, axle load, turning radius, joint layout, dock-door salt exposure. This decides thickness more than any colour choice.
  2. Test and grindDay 1, 4–6 h per 500 m²Moisture reading plus CSP 3–5 diamond profile. Curing compound or old sealer must be removed entirely, not scored.
  3. Treat the jointsDay 1–2Sawn joints are filled and rebuilt; expansion joints stay movement joints with a flexible detail. Wheels crossing a spalled edge is the most common warehouse failure.
  4. PrimeDay 2, then 12–16 h0.3–0.5 kg/m² rolled wet-on-wet so the primer keys into the open profile rather than skinning over it.
  5. Broadcast fullDay 3, 2–4 h per 500 m²Binder at ≈ 4.5 kg/m² gauge-spread, then saturated aggregate broadcast and left until the resin cures under it. Excess aggregate is swept and reclaimed.
  6. Seal and open in stagesDay 4, then 7 dTopcoat at 0.15–0.25 kg/m². Aisles are closed off and released in lanes so operations keep running; full tyre loading at day 7.

Basement Epoxy Floor System

  1. Test the slab before anything elseDay −3CM reading or a 24-hour taped polyethylene square in three positions, one near the perimeter. If the slab fails, we stop and talk about a breathable water-based system or dehumidification — not about colour.
  2. Diamond-grind and vacuumDay 1, 3–4 h16–24 grit diamond segments open the pores and remove laitance and any old sealer. Acid etching is not acceptable below grade — it leaves salts in the slab.
  3. Fill cracks and jointsDay 1, 1–2 hCracks to 3 mm are overfilled with thixotropic epoxy; movement joints stay movement joints and are covered with a flexible detail, never bridged.
  4. Roll the moisture-tolerant primerDay 1, then 12–16 hWet edge to wet edge, 0.25–0.4 kg/m². This is the coat that decides the life of a basement floor, so it is never skipped to save a day.
  5. Pour the self-levelling bodyDay 2, 2–3 h3.4 kg/m² mixed, gauge with a notched squeegee, back-roll and spike-shoe to release air. Basements are cold, so open time is longer and the pour must not be rushed.
  6. Satin topcoat and cureDay 3, then 7 dA low-sheen coat at 0.15–0.2 kg/m² for slip behaviour when damp. Walk-on the same evening; nothing sits on the floor for 24 hours, and full chemical resistance takes 7 days.

Heavy-Duty Anti-Slip Garage Epoxy Colored Sand

  1. Find out what is already on the slabWeek −2New garages are commonly poured with a cure-and-seal or a floor hardener, and previous owners love gloss paint. Drop water on it: if it beads rather than soaking in within a minute, there is something on there that has to come off. A milky white bloom under a failed coating is the same story.
  2. Measure the slab, do not eyeball itWeek −2Moisture ≤ 4 % CM by CM test, or a 24-hour taped polyethylene sheet near the door and at the centre. A garage slab is normally on grade with no damp-proof membrane, and the open door dries the top centimetre enough to fool anyone looking at it.
  3. Degrease, then diamond-grindDay 1, 3–4 h per 100 m²Oil spots first — grinding a wet oil stain drives it deeper into an open profile. Then grind to CSP 2–4, expose sound concrete and vacuum to a dust-free surface. No grinding is the single most reliable predictor of a lifted garage floor.
  4. Repair and detailDay 1–2Static cracks routed and filled, corners and the door threshold detailed, expansion and perimeter joints left as joints with a flexible detail. Check the fall: garage slabs slope to the door, and water has to leave.
  5. Prime and broadcastDay 2, then 12–16 hPrimer worked into the profile, then full saturation with coloured quartz into the wet film — one bay and one door line per pot. Back-drag to seat the aggregate once it has set enough to walk on.
  6. Topcoat and release by temperatureDay 3, then 7 dDense seal coat, fine aggregate added along the door line where water and salt come in. Walk-on 12 h, drive-on 24 h at 20 °C, and no hot tyre standing on it before day 7.

Anti-Static Self-Leveling Epoxy

  1. Survey and set the earth planDay 1Locate earth points, define the grid and log the target resistance before any material moves.
  2. Grind and vacuumHalf dayCSP 1–2 profile; resistivity of the slab is measured and recorded.
  3. Conductive primer3–4 hRoll the carbon primer and keep it wet-edged under the tape layout.
  4. Copper grid and bonding1 dayLay the tape mesh, bond to earth terminals, and record resistance at every test point.
  5. Anti-static pour and de-airPer zoneWeigh A:B exactly, pour 2–3 mm, spike-roll within 10 minutes.
  6. Wear coat and commissioningDay 4–8Apply the conductive wear coat, then test system and person-to-floor resistance after cure.

Cement-Based Self-Leveling Compound

  1. Check the baseDay 1Sound, clean, and free of laitance; crack and joint positions recorded.
  2. Prime twice if porous1–3 h dryDiluted first coat, full-strength second; a dusty base is the usual cause of delamination.
  3. Dose the water exactlyPer batchWeigh the water. Over-watering lowers strength and raises drying time.
  4. Pour and squeegeeContinuousStart from the far corner, gauge the thickness, then spike-roll.
  5. Protect from draughtsFirst 24 hClose windows and stop radiant heating; fast drying causes cracks and curl.
  6. Test before coveringBefore next tradeConfirm moisture ≤ 4 % CM before any resin or impermeable flooring.

Epoxy Self-Leveling Flooring

  1. Assess and grindDay 1Measure flatness and moisture, then diamond-grind to CSP 1–2 and vacuum the dust.
  2. Repair and level4 h + dryFill cracks, bridge joints, and pre-level deep low spots with the cementitious compound.
  3. Prime2–3 hRoll the low-viscosity primer; a starved primer causes pinholes.
  4. Mix and pour in ribbons30 min/batchWeigh A:B exactly, mix 2–3 min slowly, pour and guide with a gauge rake.
  5. De-air with a spiked rollerContinuousRoll immediately and again after 10 minutes; keep the wet edge broken.
  6. Cure, protect, releaseNext dayKeep dust and moisture off for 24 hours; do not seal before full outgassing.

Flake Epoxy Colored Sand Flooring

  1. Grind, and break the tile if neededDay 1Over old tiles, grind to open the glaze; deep cracks get an epoxy mortar bridge.
  2. Prime and patch2–4 hSeal the slab, fill spalls, let the primer go tack-free.
  3. Wet bed plus full broadcast1 h/100 m²Gauge the resin, then broadcast flakes and sand until the resin is no longer visible — a starved broadcast is the #1 failure.
  4. Roll-in and sweep backSame dayOnce the bed sets, sweep loose grain and lock the standing texture.
  5. Seal in two crosses8–16 h laterFirst seal saturates the texture; second one builds the wear film.
  6. Release to useNext dayFoot traffic in 10 hours, rolling vehicle traffic in 24 hours — a car parked hot on the film needs the day-7 full cure first.

Flexible UV-Resistant Self-Leveling Epoxy

  1. Assess and grindDay 1Measure flatness and moisture, then diamond-grind to CSP 1–2 and vacuum the dust.
  2. Repair and level4 h + dryFill cracks, bridge joints, and pre-level deep low spots with the cementitious compound.
  3. Prime2–3 hRoll the low-viscosity primer; a starved primer causes pinholes.
  4. Mix and pour in ribbons30 min/batchWeigh A:B exactly, mix 2–3 min slowly, pour and guide with a gauge rake.
  5. De-air with a spiked rollerContinuousRoll immediately and again after 10 minutes; keep the wet edge broken.
  6. Cure, protect, releaseNext dayKeep dust and moisture off for 24 hours; do not seal before full outgassing.

Metallic Epoxy Colored Sand Flooring

  1. Diamond-grind the slabDay 1Remove laitance, curing compound and old coating; open the pores to a CSP 1–2 profile. Vacuum, never sweep only.
  2. Repair and prime2–4 hFill spalls and control joints with epoxy mortar, then roll the penetrating primer. Prime the same day to keep the surface dust-free.
  3. Spread the binder30 min/batchPour the mixed epoxy in ribbons and gauge it to 1 mm with a notched squeegee.
  4. Broadcast and create the effect1–2 h/100 m²Shake colored sand and metallic pigment into the wet binder, then open the flutes with a spike roller while it is still glossy.
  5. Seal and topcoat6–12 h afterRoll off loose grain, apply the clear UV-resistant topcoat in two crosses.
  6. Protect and hand overDay 1 → 7 dBarrier off the area, no water or dust for 8 hours; light service after 24 hours; full mechanical properties at 7 days (20 °C).

Solid Color Epoxy Colored Sand Flooring

  1. Grind and vacuumDay 1CSP 1–2 profile, no laitance left; dust is the main cause of delamination.
  2. Prime2–4 hRoll epoxy primer and let it go tack-free.
  3. Broadcast the pigmented sand45 min/100 m²Spread colored sand into the wet resin and lock it with a second roll of binder.
  4. Roll off and flattenSame passRemove loose grain and level the texture so the colour field reads uniform.
  5. Seal coat6–12 h laterApply the chosen gloss seal coat; keep the wet edge to avoid lap marks.
  6. Cure and releaseNext dayBarrier off; foot traffic after 8 hours, furniture after 24 hours.

The site rulings our own system pages make, quoted as written

Every line below is lifted whole from an installation note on the system named beside it. They are not decoration: each one is a case where a programme that looks fine on paper stops on site.

Colored Sand Floor Over Existing Tiles

  • Do not bridge a movement joint or the threshold expansion line. Cover them with a flexible detail or they re-open as a crack directly above.
  • Do not treat the coating as a tanking layer. Where a waste or an appliance has leaked, the slab is dealt with first and the floor is a finish over it.
  • Expect the room to look different under the film. A tiled floor has a fall, and a skimmed floor follows it; a lippage of a few millimetres at a door is still there afterwards.
  • Check the perimeter and the doorway thresholds before handover. Those are where a thin over-tile build is most likely to be picked up by a door, a mat edge or a vacuum cleaner.

Kitchen Colored Sand Floor Coating

  • Do not treat the coating as a tanking layer. Where a dishwasher or a sink waste has leaked for years, the slab is dealt with first and the floor is a finish over it.
  • Do not bridge a movement joint or the threshold expansion line. Cover them with a flexible detail or they re-open as a crack in the film.

Bathroom & Wet Room Colored Sand Floor Coating

  • The coating is not the fall. Water that ponds will stay there and will find the perimeter of the film, so the gradient is settled before this build is quoted.
  • Do not bridge a movement joint or a change of plane. Cover it with a flexible detail, or it will re-open as a crack in the film and water will go under it from there.
  • Below grade, or on a slab that has never been tested for moisture, test the slab before anything else. This build is vapour-tolerant only as far as the primer makes it.
  • The open profile holds grit and hair, so vacuum the room rather than only mopping it, and keep entry mats at the door — grit is what scratches a gloss floor.

Outdoor Colored Sand Floor Coating

  • A deck that ponds water is not a coating job. Fix the falls first, or specify a drainage detail; anything else just marks where the water used to sit.
  • Do not bridge a movement joint. An exposed slab moves seasonally by more than an indoor one does, and the film will crack exactly on the line — then water gets under it.
  • A hot slab in afternoon sun is the most common reason an outdoor pour stops mid-way. Work the shaded side first and plan around the sun, not around the crew.

Interior Decorative Colored Sand Floor Coating

  • A gloss film shows substrate telegraphing — a tile joint line under a coating is permanent, so abrade and level harder than feels necessary.
  • Do not bridge a movement joint. Cover it with a flexible detail, or it will re-open as a crack in the film.
  • Below grade, test the slab for moisture before anything else. This build is vapour-tolerant only as far as the primer makes it.

Laboratory Chemical-Resistant Epoxy Floor System

  • Sinks, wash-down bays and floor drains are where a lab floor dies. Put the coarse texture there, detail the cove into the drain frame, and check the fall before you coat.
  • Never bridge a movement joint with rigid resin. In a lab the joint will also be carrying thermal cycling from the slab above.
  • Let the floor cure before the fume hood runs. A cold slab under a warm, humid room crosses the dew point and blushes the topcoat — the most common reason a lab floor looks mottled in week one.

Epoxy Floor Over Existing Tiles

  • Never abrade a pre-1980s tile bed or bitumen adhesive before an asbestos survey. Encapsulation is a legitimate strategy; grinding it into dust is not.
  • Porcelain is denser than ceramic and takes a key far worse. Grind it, do not polish it, and pull-off test a trial area before committing a large floor.
  • A hollow-sounding tile is not a substrate. Lift it, fill the void flush, then coat — resin over an air pocket cracks on the first loaded wheel or dropped pan.

Parking Deck & Ramp Anti-Slip Epoxy Floor

  • Do not bridge a movement joint with rigid epoxy. An exposed deck cycles seasonally and the resin will crack exactly on the line — then water gets under it and frost finishes the job.
  • Morning dew on a deck at 3 °C above air temperature is the most common reason a ramp job stops mid-pour. Plan the window, not just the crew.
  • Salt is less dangerous to the coating than to an unsealed joint edge. Detail the joints and keep them maintained; that is where decks actually fail.

Hospital & Clinic Seamless Epoxy Floor

  • The cove has to be built before the body coat. A fillet applied afterwards shows a cold joint and lifts at the wall in a year.
  • Never pour over foam-backed vinyl or its adhesive. The bond is to the glue, not to the slab.
  • In summer, a cooled slab under a warm humid room will sit below the dew point and blush the film. Run the HVAC during application, not after.

Basement Epoxy Floor System

  • Never coat a slab that has failed a moisture test because the customer is in a hurry — that is where the peeling videos come from.
  • Check for a perimeter drain or a sump that runs: a dehumidifier cycling hard is a sign the slab will keep pushing vapour.
  • Do not bridge a movement joint with rigid epoxy. It will re-open as a crack in the film within a season.
  • Let new concrete outgas first: a slab poured less than 28 days ago will blister regardless of primer choice.

Heavy-Duty Anti-Slip Garage Epoxy Colored Sand

  • Do not let anyone sell this as a roll-on-over-dirty-concrete job. The listings that promise no surface preparation are the ones that come back up in a year.
  • Choose a mid-tone. Black tyre scrub and grit marks show on a dark, high-gloss floor and disappear on a warm grey or tan with a broadcast profile.
  • Never bridge a movement joint or the perimeter joint with rigid resin. A garage slab also swings in temperature more than the conditioned floors inside it.

Flake Epoxy Colored Sand Flooring

  • Broadcast generously — under-broadcasting leaves resin pockets that become slick and telegraph the slab.
  • Provide 3 % falls and a drain detail in wash-down areas before we quote the seal coats.

Metallic Epoxy Colored Sand Flooring

  • Never skip grinding — a 3.8 MPa bond is a substrate result, not a resin result.
  • Check the dew point: condensation during the cure leaves haze and pinholes.
  • Do the sample board on the actual slab; metallic reads differently over grey versus beige concrete.

43 notes quoted across 16 systems. Anything they commit us to is repeated from the system page, never restated here in our own words.

What this page deliberately does not claim

  • We do not certify your slab. The readings belong to your building and to whoever is responsible for the result. We specify which readings we need before quoting, and we read what you bring back.
  • No test is being done on your behalf. Where a sheet names a method, it is telling you what to ask your tester for — not a report from us, and not a reason to skip the measurement.
  • No gate we cannot publish. If a system's sheet is silent on a condition, this page shows the silence rather than filling it from a sibling product or from an industry figure.
  • Some fixes are not ours to supply. A slab that keeps pushing moisture, a deck that needs a fast-returning traffic system, a solvent or hot-wash-down duty floor: those are different products, and the honest answer is said at quotation stage rather than discovered on site.

Get a Free Quote

Send us the slab, not just the area

Tell us the pour age, the moisture reading if you have taken one, whether there is a damp-proof membrane, the ground or basement condition, and the temperature you can hold on site. We will quote against those instead of guessing, and we will say plainly which cases this system is not for.

  1. Tell us about the floorArea in m², substrate condition, and the finish or colour you want.
  2. Get a technician's replyWithin 24 hours: system build-up, coverage estimate, pricing and TDS/MSDS.
  3. Confirm colour & sampleFree colour chips and a cured sample panel before you place an order.

* Required fields. Your information is only used to respond to your inquiry.

Request a Quote

We reply within 24 hours

* Required fields. Your information is only used to respond to your inquiry.