
Step 1 — Assess & prep the substrate
Grind, vacuum and prime. The slab must be sound, clean and dry.
Grinding is not cleaning. The goal is an open, abraded surface with the laitance gone — that weak, cement-rich skin the tamping leaves on top — because resin bonded into laitance peels with the skin still intact underneath. Then vacuum rather than sweep: dust sitting in the opened pores turns the priming coat into a bond breaker.
Judge the slab by a measurement, not by a calendar. New concrete is normally given weeks before any resin, but the number that actually gates a pour is a moisture reading taken through the slab, and each product publishes its own threshold in its specifications. A slab sheeted with plastic can look old and still read wet.
Step 2 — Repair & level
Fill cracks and low spots; use a cement-based self-leveling compound for deep areas.
The two layers are not interchangeable. A cementitious underlayment is a preparation product: it takes depth, it breathes, and it is meant to be covered. The resin on top is the wearing floor. Trying to build height with resin instead costs mass and traps solvent under a thicker bed than the product is designed to release.
Do not bury a damp slab. Epoxy forms an impermeable film, so any water still in the concrete has nowhere to go except through the interface — that is where blisters and loss of adhesion come from later. Fix the source first: a working damp-proof membrane, or a drainage and fall detail outside the building.
Step 3 — Mix precisely
Follow the A:B ratio exactly and mix slowly to limit trapped air.
Mixing slowly is not a preference. Air entrained during mixing is what leaves pinholes after the de-air pass, and a pinhole in a gloss floor is a permanent speck of shadow. Scrape the sides and base of the bucket halfway through; an under-mixed batch cures soft in streaks rather than not at all, which is worse because it looks finished.
Weigh the ratio rather than judge it by eye, and mix one full batch at a time. The ratio for the system you bought is printed on that product page, and the coloured-sand kits and the self-levelling kits do not share one ratio.
Step 4 — Pour & spread
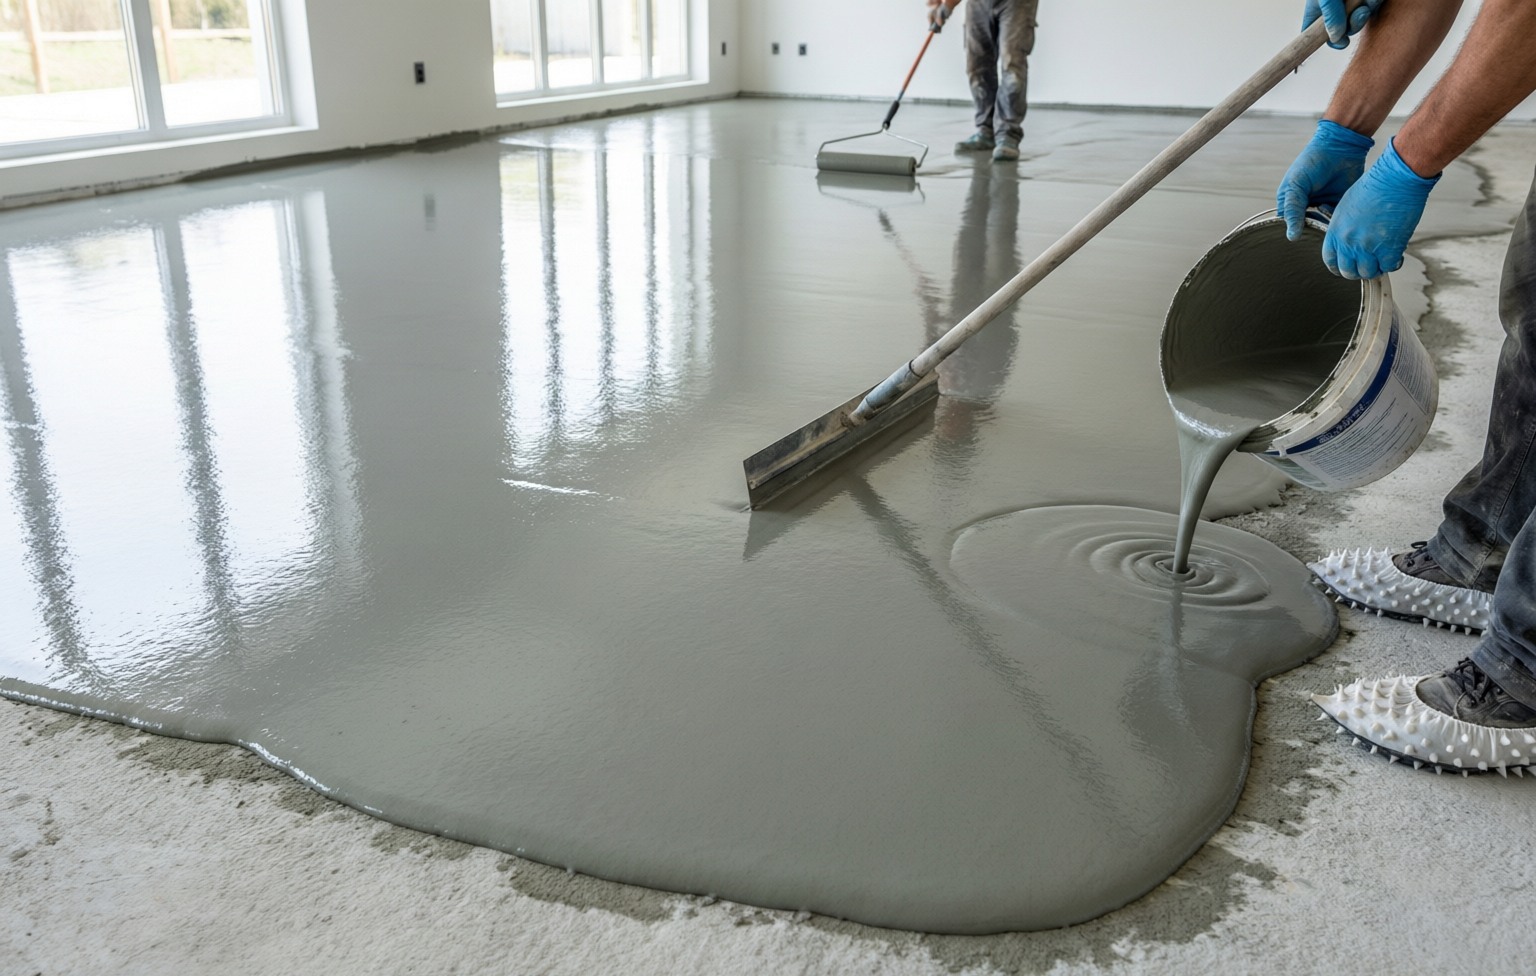
Pour in ribbons and spread with a gauge rake to the target thickness.
Set the rake to the thickness you specified, not to what is left in the bucket. Work out how much area one batch covers before you tip the first one, because the open time — not the room size — decides how much you can close in a single pass.
A second bay poured after the first has begun to gel leaves a lap line, and a lap line in a mirror finish shows under ceiling lighting for the life of the floor. On a larger slab, plan the pour as bays split by planned lines rather than as one race across the room.
Step 5 — De-air
Back-roll with a spiked roller to release bubbles and even the surface.
Back-rolling does two jobs: it pops the air the mixing trapped, and it levels the ribbons. It only works while the film is still mobile — a roller dragged through a surface that has already started to set drags more air in than it releases, and every pass leaves its own texture.
Spiked shoes and a second person make this predictable: one pours and rakes, the other rolls behind. If you are working alone, shrink the area you mix at a time instead of trying to be faster.
Step 6 — Cure
Protect from dust and moisture; walk on in about 8 hours, keep traffic off until 24 hours, and wait the full 7 days before any chemical or heavy load.
Keep the room ventilated but closed against dust, and do not cover or seal the film before it has finished outgassing. Covering a curing epoxy traps the volatiles that are trying to leave and gives them a film to blister under.
The three timings above are the site-wide windows. Several products publish stricter ones for their own loads — a garage build that takes vehicles, or a clinical floor that takes bed castors — and where a product page is stricter than this guide, that page is the one to follow.
Before you order, have these four answers
Area in square metres, a photo of the slab, the target thickness, and the room temperature including the season. Those four decide the system, the priming passes and the number of sets; a quotation built without them is a guess about someone else's floor.
The cost page publishes consumption per layer so you can turn a thickness into a set count yourself, the FAQ answers the cure and substrate questions we get most, and self-levelling epoxy and cementitious levelling compound carry the numbers for the two layers this walkthrough uses.